Ulrikasb - a good question. Both the Wanderwagon and the Randonee are nice trailers but both make a few design mistakes, mainly to cut costs (or a lack of practical 'in the field' knowledge)..
The first is that both have straight drawbars that angle upwards and stop short rather than having an angle adaptor so that the front section can be made horizontal. The two benefits to this are that then the drawbars are at a natural height for the hands, and therefore there is much more control available. Both those designs more or less have the trailer as a tag along rather than a controlled vehicle - which you get with useful drawbars that end up in front of the body, horizontal. After all, you don't attach a horse drawn cart to the rear of the animal.
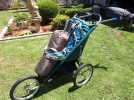
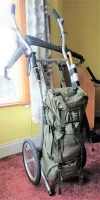
The Wanderwagon makes much of their welded aluminium frame but if you look at it objectively you can see that the design is faulty - a rucksack inside it could (and would) easily rub on the wheels (though they could put two vertical bars either side to protect from that). Also, they use a shoulder harness as well as a (thin) hip belt - but this means that there is too much weight at the front and also that one has weight on the shoulders and body - and the point of a trailer is to remove all weight from the body! So not good.
Now - where to place the axle? ! Well, if it is horse drawn then you want weight on the bars so that it connects properly to the horse and harness, but with a human it is different ... there should be the absolute minimum weight on the hip belt, just enough to make the cart stable, less than half a kilo is fine.
with a cart that is horizontal the axle should in the middle, which allows the loader to arrange the load so that the hip belt weight is correct.
With the Radonneur, as it is not a horizontal cart but angled the axle has to be as close to the rear as possible otherwise the back of the trailer would be much too close to the ground.
So if you are making your own? A horizontal trailer, axle in the middle, and angled trailer axle at the rear, not quite fully at the rear but so that the axle is under the main load when the trailer is lifted up.
If the axle is deployed in the last third of the load bed then on an evenly loaded
horizontal trailer this puts much more weight on the drawbar end and therefore more weight on the hips .... so (to me) they have made a mistake there. Conversely, bring the axle towards the front of the load bed and there is a possibility of 'see-sawing' as there would not be enough weight at the front end - so (again, to me) I prefer an axle on a horizontal cart to be in the middle of the load bed.
I think you are building your own trailer? If so please feel free (and anyone else) to message me for sources of components and tips on building my design.
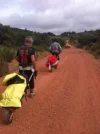
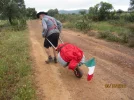
Below are pics of my latest trailer, my Mk5 - though actually it is the Spot Mk3 (third design of the one I made for my pal JennyH94 in Aus that she named Spot).
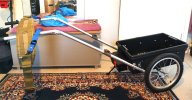
You can see that this is a box, with 16" spoked wheels - the drawbars are telescopic so the length can be adjusted to need - also, shorten the bars and the front rises, lengthen them and the front drops, so one can easily get the load bed horizontal. The telescopic end has an easily adjustable angle adaptor to make the bar ends horizontal - and they are long enough to end just in front of the body - so full control.
The front drawbars are clipped (removable) to a padded hip belt and you can see where the D rings are fitted to allow the front of the bars to extend horizontally just forwards of the body. The blue straps can be adjusted in length so that the hands naturally rest at drawbar height - those straps also act as shock absorbers for the slight forwards and backwards movements that all trailers make as you walk.
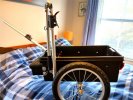
Merely by removing one fixing bolt (held on by a finger-tight butterfly wing nut) the bars can be telescoped down and made vertical - in seconds - this is good for restaurants, refugios, etc.
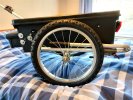
but then can be folded right back for packing away for transport on a bus or train after wheels removed and all put into a bag. One can also remove the drawbars and put them in the box, leaving only the shorter lower sections.
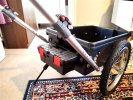
A closer photo of the front - you can see that there is a bicycle kick stand attached for parking.
And a small lockable toolbox bolted to the front for some tools and spares and rain cover and bungees for on Camino repairs and adjustments.
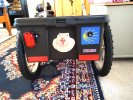
The rear - removable bicycle light attached.

These are the axle brackets. The axle is a mild steel rod and those clamps are made for clamping hydraulic pipes to machinery. There are reinforcing plates on the inside of the box. The black axle spacers are actually rubber door stops, drilled through.

I use tailgate spring clips to secure the wheels - can't be pulled off by running into bushes but can be taken off in one second to release the wheels. They could easily be replaced by small padlocks for security.
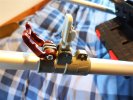
And these are the locking tube clamps, open. Two secure push down locks so they really hold the poles.
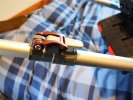
and here the clamp neatly closed.
Oh - and here my Mk5 with my first aid sign for Camino!
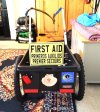
So - I have made a number of trailers, tried many ideas, discarded many ideas and this one I am very happy with, my final design I think. Weighs 6.5 kilos - the new Hipstar weighs 6.8 and the Wheelie 6.3 so in the middle.
I have fitted D rings all around the box for attaching bungee cords and the cart top lip allows a rucksack cover to securely fit on it. Years ago I was doubtful about it being a plastic box but Jenny has used hers for years now, over many thousands of kms, and it is still as good as when new. They can't be seen but where any bolts go through there are mild steel reinforcing plates bolted on inside.
Hope this helps - oh!! my axle is in the middle of the load bed but ten cms slightly forward to allow for the weight of the toolbox so in the middle overall...
Any questions at all welcomed, happy to explain "why did you do that?" and so on.


